


 By
By What are the best 3D printers for professional use? Instead of diving into the deep end, you might just want to dip your toe in. Making the decision on what system to start with is quite overwhelming with so many 3D printers on the market, each employing very different technologies.
Fortunately, TriMech can help make that decision a bit easier for you.

Our Top 4 Best 3D Printers For Professionals
Best FDM 3D Printer
What is FDM printing?
Fused Deposition Modeling (FDM) is likely the most widespread and widely adopted method of 3D printing. When you think of 3D printing or additive manufacturing, FDM is probably the technology that comes to mind first.
FDM is an extrusion-based process, where plastic is heated until it reaches a semi-liquid state and is then extruded along computer-controlled paths to construct objects layer by layer.
Which FDM printer is the best for professional or industrial use?
There are great options for the lone inventor, student, or even engineer to have a beginner FDM 3d printer on their desk. However, there comes a time where you need to upgrade to the industrial printing side of things and that is absolutely the Stratasys F170.

Stratasys F170 FDM 3D Printer
The F170, like the S7, is incredibly easy to use, but packs the well established Stratasys name brand reliability, print repeatability, machine uptime, and overall fantastic build quality that all Stratasys printers are known for.
When it comes down to it, if you need high accuracy parts, day in and day out, with no tinkering, fidgeting, or heartburn in “making the printer work”, the Stratasys F170 is the best beginner 3D printer for industrial applications on the market.
Why is F170 the go-to FDM printer?
Heated Build Chamber
The consistency in part quality and accuracy that the well insulated heated build chambers of all Stratasys FDM printers provides is the single most important feature to keep in mind when looking at a higher cost beginner friendly printer.
Nearly all FFF and FDM printers these days have a heated bed, but without consistent heated air throughout the entire chamber, layer to layer adhesion after the first inch or so can become problematic, and can often result in questionable part quality, or even parts with split layers!
Automatic Calibration
The F170 never needs to level its bed, since that’s done at the factory. And if any adjustments needed to be made, they would be completed by TriMech’s expert Field Service Technician team.
With that said, whenever you change print heads, you do need to calibrate the Model tip to the Support tip so that the printer knows exactly where one is in relation to the other.
While there is a manual calibration that you can dial that in super tight with (no tools, just a loupe and a pair of calipers), there is also an automatic calibration that can get you off the ground and running without doing anything yourself.
GrabCAD Print
GrabCAD Print is an incredibly easy to use slicer software that, like Cura, is free with your F170 printer, and makes the slicing process as easy as possible for a beginner.
Using the free GrabCAD Print server software, you can also enable cloud access, giving you visibility to the printer status and webcam when outside of the local network of the machine.
Best In Class All Around
The Stratasys Fseries, which the F170 is a member of, are the most reliable, accurate, and fastest printers out there compared to their top direct competitors, and that’s not a figure of speech. Studies have documented this in direct comparison and being a Stratasys F170 user myself for years now, I can absolutely back that up with my own experience!
Best LCD Style 3D Printer
Interested in a fast and smooth printer?
A recent addition to the TriMech Family of printer offerings, the Formlabs Form 4 is an incredible resin based 3D printer that utilizes that extensive Formlabs family of thermoset resins which range from high detail prototyping materials through more durable and rigid offerings, as well as including a variety of elastomeric materials. In addition, the Form 4 is capable of printing most builds (over 75% of projects sent to Formlabs Printers) at the 100 Micron layer height in under 2 hour!

Formlabs Form 4 3D Printer
What is LFD printing?
Low Force Display printing, which is the technology behind the Form 4, works incredibly similar to DLP (Digital Light Processing) technology, in that the printer utilizes a tray that has a thin clear membrane on the bottom and a small amount of resin in the tray to print. In order to cure parts, though, it differs from the Form 1, 2, and 3 generations, in that those systems were all Stereolithography (SLA), meaning that a laser was used to cure the part, drawing out the shape and interior line by line.
LFD technology, alternatively, utilizes a series of 60 powerful LED backlights, that pass through collimating lenses to ensure that these light rays pass through parallel, and a 50 micron light processing unit that ensure your parts are build beautifully. Light output measures in at 16 mW/cm^2, which is incredibly powerful even amongst existing higher end DLP printers, and in order to get proper part peal from the resin tank film, the Form 4 uses a release texture, which is a series of bumps that prevent the part from sticking to the film flat, which can cause build errors in other systems.
Why are Formlabs Form 4 printers so popular?
Form4 systems are wildly popular for a variety of reasons, but the main one comes down to incredible capabilities for a fantastic price! The Form 4 can print in 21 materials, or 36 if you’re looking at the Form 4B (medical version), and these resins on average cost 30% less than previous generation materials.
The Form 4 is also 30% larger than the Form 3, giving it an incredible build capacity for both its price, and when compared to other printers in this range, measuring in at 7.9” x 4.9” x 8.3”. Finally, it’s incredibly easy to use; pop in a resin tank, click in place your mixer, add a build platform and a cartridge of resin, all of which can be done in around 1 minute, and you’re off to the races!
What does it look like to actually print with the Form 4?
PreForm Software
The PreForm software from Formlabs makes setting up a build quick and easy! Want to get a print running with 0 effort? There is a one click print button that will orient, support, and send your print to the system, and as long as you have a matching material loaded with a build platform and resin tank in place, it will start printing right away.
Want to get more in-depth? PreForm can ALSO give you a ton of control over part orientation and support setup. If you’re printing a smaller part and you want to minimize the supporting touch-points on the part to make removal of supports easy and relatively invisible after removal, one of the easiest things to change is the “Touchpoint Size” setting.
Don’t like where the software is putting supports, or want to add more? Clicking on an existing support point deletes it, and clicking on the model adds another one. Even better, if you want to add a variety of supports to an area of a part, left click and drag across the surface, and the PreForm software will paint perfectly spaced touchpoints across that area.
PostProcessing
Once the print is finished, there are two more steps that need to be completed before you part is ready to handle and use: Cleaning and Curing.
- Cleaning:
For the Form 4 generation, Formlabs has released a second generation FormWash unit, which is quite a bit larger than the original Form Wash, and can utilize brackets to hold the build platform in place when cleaning. Also, the recently released Formlabs Resin Washing Solution completely replaces traditional IPA or TPM usage, replacing it with a substantially safer, longer lasting, and less evaporative cleaning fluid to remove excess resin from your parts.
- Curing:
Once your parts are cleaned and dried, the Form Cure unit enables programing for cycle time and chamber temperature, allowing you to control the process depending on what resin you are using. A series of UV LED’s and a mirrored back to the chamber ensure proper light distribution, and a slow rpm rotation tray ensure that all parts get cured evenly!
Best PolyJet 3D Printer
What is PolyJet printing?
PolyJet 3D Printing works by jetting layers of liquid photopolymer onto a build tray and instantly curing them with UV light.
This webinar talks about how PolyJet 3D printing is being used to save time, money, and resources.
Why are PolyJet printers popular?
Working with the widest range of material options, PolyJet technology is the best on the market for full color prototyping. PolyJet printers could run several materials at the same time and mix them together to create a fantastic range of realistic models.
PolyJet technology prints incredibly fine 19 micron layers that ensure that your part has the smoothest curves, highest accuracy, and the best overall part quality possible.
While most other resin-based printers require a secondary UV Post-Cure, meaning the parts aren’t complete out of the printer itself, PolyJet printers utilize onboard LED UV lamp to 100% cure your parts during the printing process, leaving you with safe to handle parts without the need for a massive amount of PPE gear.
Among these, we especially recommend the Stratasys J35 as the most budget-friendly PolyJet 3D printer.
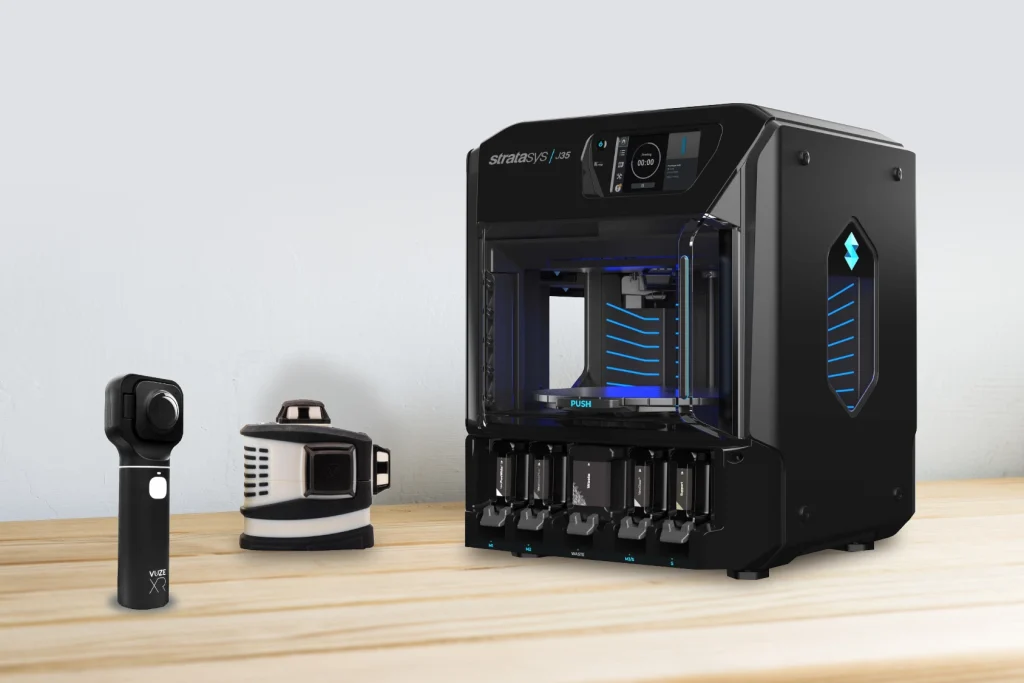
Stratasys J35 desktop resin 3D printer
Why do we want to talk about the J35 printer?
Multi-Material Magic
Printing in three materials at the same time gives the user a ton of flexibility in design, and I don’t just mean that figuratively; I also mean LITERALLY flexible!
The most common materials used on the J35 are VeroUltra White (Ultra Opaque, even for walls under 1mm thick), VeroUltra Black, VeroUltra Clear, but also the Elastico Clear and Black, which are thermoset rubberlike materials with a base ShoreA durometer of 45, and can be mixed with most rigid materials to achieve a durometers of ShoreA 50, 60, 70, 85, and 95, along with rigid “Simulated Polypropylene-like” combinations.
Add in a two component simulated ABS-like material called Digital ABS that has mechanical properties (strength/durability/heat resistance) that get close to that of thermoplastic ABS, this system is a powerhouse of capability!
GrabCAD Print
Like GrabCAD Print for the F170, this software also powers the PolyJet printer lineup. Again, it’s an incredibly easy to use interface, but on the PolyJet system we see added capabilities with regards to the assigning of material properties of each body or part in an assembly, or each part on the tray.
It may sound complicated to dial up something like a digital combination of a rubberlike material and a rigid, but GrabCAD Print makes the process incredibly easy!
Safety
There are often fears that people have surrounding resin-based platforms, but the J35 system is completely self-contained, meaning you’re never going to directly interact with liquid resin.
Cartridges have rubber caps that connect directly to material bay slots and draw material out of the cartridge, straight up to the head. The head jets out the resin using piezoelectric nozzles precisely where they need to be on the tray, and the LED UV lamp passes over those parts during the ensuing rotation, curing the part 100% on the tray.
Once the part comes off the tray, all you need to do is remove the gelatin like support material (by hand, by waterjet, or if using the WSS150 material then by dissolving in water), and you’ve got your part in hand!
Best SLS 3D Printer
What is SLS printing?
SLS Printing is a powdered thermoplastic printing technology that uses a laser to fuse powdered polymer together from layer to layer, resulting in near net isotropic build properties throughout the entire part. Formlabs Fuse 1 and 1+ SLS printers offer a great range of polymers to print in, and include some great post-processing equipment to ensure that you get great parts consistently, quickly, and with fantastic build quality.

Formlabs Fuse 1+ 30W SLS 3D Printer
What makes the Fuse 1 and 1+ so great?
First off, the Fuse 1 and 1+ print at 110 Micron layer height, which results in incredibly smooth parts with high detail and part accuracy. Next, the build chamber is removable once the print has cooled to 100C after printing (estimated in the software and included into the print time), after which another build chamber can take its place in the printer, and you can get going again right away. Also, most SLS and other powder based printing technologies are incredibly messy, but the Fuse ecosystem was built to be clean and safe, making it super easy to run in any workspace.
SLS Technology is best known for its throughput capabilities; for example, most builds that take the entire build capacity of the Fuse 1+ of 6.5” x 6.5” x 11.8” tall, filled to the brim with parts, usually take between 16 to 24 hours to print, and most of the time that includes dozens to hundreds of medium to smaller parts.
What materials can you run on Fuse 1+?
For most powder printing technologies, it takes an incredibly long time to release new validated materials that are known to work with the printer, but in the short three and a half years since its release, it’s amassed a lineup of 6 incredible thermoplastics for users to run! Looking for an elastomeric part? You can run a ShoreA 90 TPU in your Fuse. Want extreme durability?
The Fuse 1+ is capable of running a Carbon Filled PA11 material that stands above all other materials. Need soft parts that are still solid and not rubbery? Polypropylene adds some great depth to an already incredible lineup, which also include the industry standard PA12, the slightly better mechanically PA11, and also a glass filled PA12 for higher rigidity.
The Ecosystem of Fuse
With powdered thermoplastic printing, it’s not just about the printer, since you have to get the parts out of the build chamber, and then clean off all of the loose powder off of your parts. By hand, this is a nightmare! But, using the Fuse Sift for a rough cleanup, and then tossing the parts into the Fuse Blast to go in an automated media blasting cycle make post-processing a breeze!

Formlabs Fuse Ecosystem
The Fuse Sift
The Fuse Sift has several jobs, but at its core, it’s to help you remove your parts from the build chamber. Plug your build chamber into the Sift, and it immediately knows the temperature of the powder, alerting you to whether or not the build is cool enough to “break out”. Next, it powers the unit to eject the contents of the build chamber upwards, enabling you to start pulling your parts out, and recovering unused powder.
Recovering unused powder? Yup, that’s another important job that the sift does; because we don’t use supports, but we generally stack parts above and below one another, powder is pushed evenly across each layer, and then we fuse powder exactly where needed to produce your parts. So, when you break out your parts, you do it over a multi-layer sieve, which vibrates when running, breaking used powder back down to a printable particle size, after which the Fuse Sift can fill containers in the desired refresh rate that you are targeting.
For example, when running PA12, we aim for a 30% new, 70% recycled powder ratio. After filling the container, a trap door is closed, and then the cartridge is placed to the right side of the unit to complete a “mixing” cycle, which evenly spreads the fresh powder in with the older powder. Once that’s done, open the powder hopper door, pop the cartridge on upside down, and open the trap door to fill the hopper back up with powder for your next build!
The Fuse Blast
The last piece of the puzzle is the Fuse Blast. This powerful component was released in early 2024, and has become an immediate staple in the Ecosystem, since prior to its release, the “full cleaning” process for powder removal had been incredibly time consuming since it was all by hand.
The Fuse Blast utilizes a rotating barrel, connects to shop air, and uses 40-60 mesh size glass bead media to lightly force the remaining powder on your parts to fall off the surface, leaving beautiful ready to use parts. All you need to do is toss your parts in, place the nozzle in front of the barrel, set your time, psi, and barrel RPM, and the Blast takes care of the rest!
Pre-programmed modes also work great, with settings for long runs, delicate parts, and more. The blast even has gloves and a foot pedal in case you have parts that you don’t feel safe running in the automated barrel, enabling you to lower the nozzle and manually blast parts.
Also, new this summer, is a new drop-in upgrade that can give you an even better overall part finish than the standard blasting, through use of the Polishing System Add-on. A few minor hardware upgrades enable you to change out your media from glass bead to the Formlabs Polishing Media, as well water mixed with a small amount of polishing agent. Take your parts to the next level, smoothing them beautifully, creating an even better end-use part using the upgraded Fuse Blast!
Conclusion
While the number of 3D Printer’s on the market seems massive, the majority of those printers aren’t worth your time in tinkering, your energy in post processing, or your money in lack of reliability.
With that said, our list of the top 4 best 3D printers that are budget-friendly are all highly capable, easy to use, and most importantly reliable!
Looking at stat sheets for what a printer can do, often the listed capabilities of the system tend to drift a bit from what it can “actually” do consistently, so always keep that in mind when weighing your options as your look for your first, or next step up in a 3D printer.
Whether you need more advanced capabilities or more budget-friendly printer for professional and industrial use, our experts got you covered!

Written by Rich Annino
Rich Annino is a Hardware Application Engineer and Additive Solutions Consultant at TriMech, specializing in advanced 3D printing technologies. He currently provides technical guidance to help clients select and implement high-end hardware, primarily from Stratasys and Artec.
Before his current consultant role, he served as the Advanced Manufacturing Services Shop Manager at TriMech’s Rocky Hill, Connecticut facility. In this role, he was responsible for maintaining over a million dollars in machinery and managing high-value 3D print service orders.
Related TriMech Solution
Learn more about the solutions featured in this Article:
Need a Quote for Advanced Manufacturing?
Contact a TriMech manufacturing expert today and get answers to your questions
Related Content
More advanced manufacturing content from the TriMech team