


3D printed anatomy models are gaining popularity among clinicians to help them get a deeper understanding of the spatial and tactile context of complex pathologies, leading to direct and downstream benefits for patients and clinicians alike. However, creating a patient-specific model can be a complex process.
In this article, we give an overview of the workflow of creating 3D printed anatomical models, as well as how to speed up the process and create the most effective patient-specific 3D printed models, all while adhering to established clinical standards and regulation.
How and Why are 3D Printed Anatomical Models Used?
Radiologists used to spend a lot of time interpreting complex 3D images for clinicians who might struggle to fully understand the images. 3D renderings on 2D screens allow better visualization but are still limited in their ability to depict all the complicated factors of a procedure.
With advancements throughout the process of creating solid 3D objects from 2D files, 3D printed models of human anatomy are transforming clinical practices by offering much more than just making anatomical images more intuitive:
Surgical Preparation
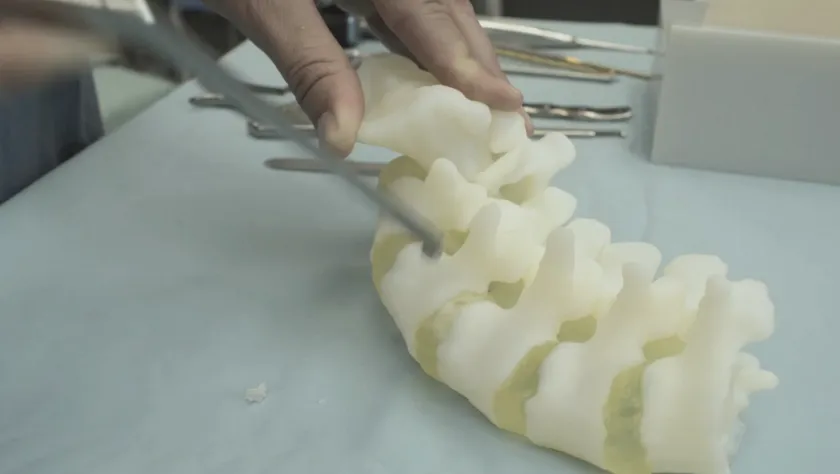
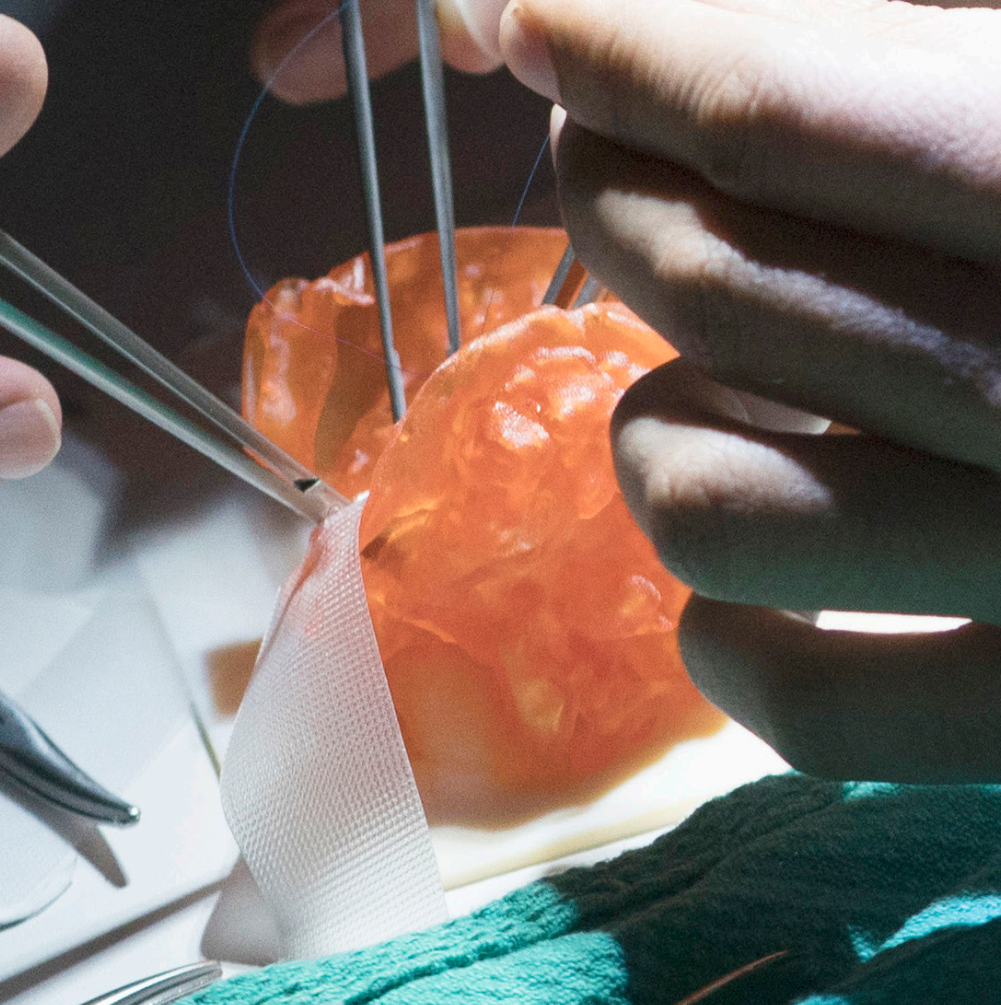
Realistic, patient-specific models are valuable tools for surgical planning, as they provide surgeons with physical, spatial, and tactile orientation. These models enable medical professionals to rehearse complex procedures in advance, helping to refine their approach.
Clinical rehearsal using 3D printed models can lead to shorter procedures with fewer complications, ultimately reducing costs, as operating room time is expensive. Stats show that on average 3D models could help save 30–60 minutes per surgery, with some cases showing over five hours saved.
Since 2006, Mayo Clinic has been using 3D printing including Stratasys’ PolyJet technology throughout their three facilities to create 3D models for over six specialties including pediatric, oncologic and cardiovascular surgery, with 900 models created per year at their Rochester facility alone.
The pre-operative trialling and hands-on simulation improve surgical precision in complex conditions, leading to improved patient outcomes and lower healthcare costs.
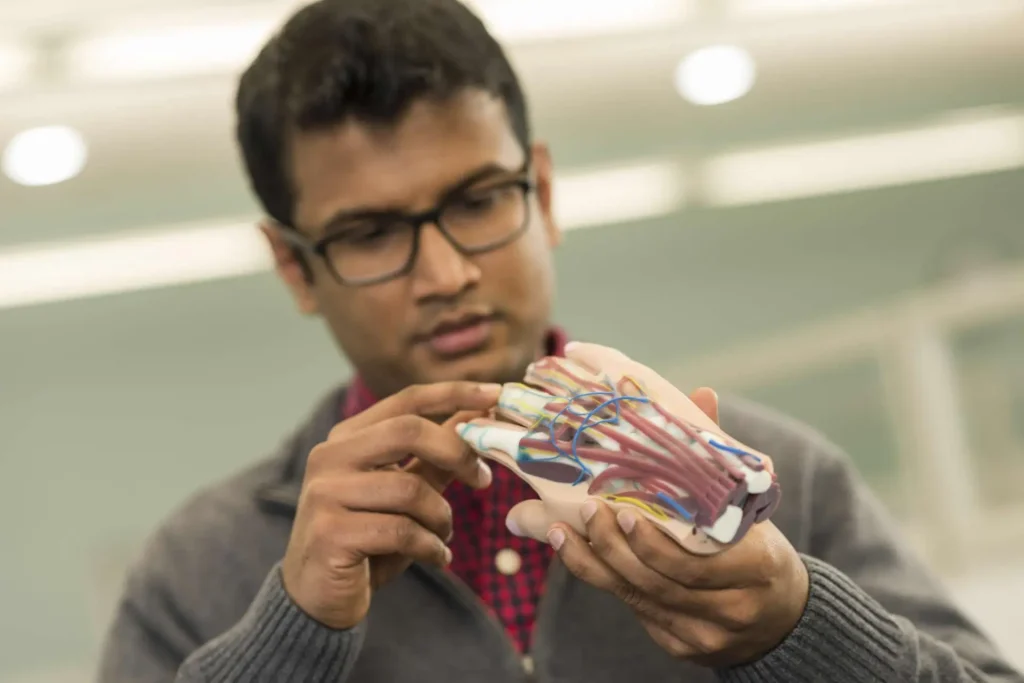
Healthcare providers can also use these straightforward yet tangible models to visually clarify complex diagnoses and treatment plans for patients, leading to better communication.
Moreover, 3D printing is also being used to directly manufacture patient specific, sterilizable surgical guides that can be brought directly into the OR and used for surgeries. Compared to off the shelf parts, surgeons note faster operation times and reduced complication rates.
Training
At hospitals, fellow workers outside of the operating room also need to have better understanding of the complications for reducing safety risk of patients and improving efficiency. At academic medical centers and universities, more efficient ways like 3D printed anatomy models to train surgical fellows and medical professionals are sought after to enhance surgical precision, reduce learning curves and education expenses, and promote improved outcomes. This becomes especially powerful in highly specialized fields, where surgeons often encounter with rare malignancies that are difficult to prepare for. For example, this user group leveraged 3D printing to create training models for placenta accretta, a condition that, without these models, is only ever able to be practice in-situ, on live patients.

Device Testing & Development
3D printed anatomy models also facilitate the design and testing of customized medical devices, as well as broader development; companies and researchers use anatomically accurate models to test prototypes under realistic conditions before human use. By using FDA certified segmentation data, device manufacturers can avoid traditional, costly means of testing, such as cadaver or animal models.

Check out our recent blog on how medical 3D printing is used for more details.
3D Printed Anatomy Models vs. AR/VR
3D printed models cost more time and money than Augmented Reality (AR) and Virtual Reality (VR), but they provide a physical, tactile experience that allows for better understanding of the spatial relationships of anatomical structures.
3D printed models are ideal for patient-specific surgical planning and hands-on training, demonstrating pathology in a tangible way, while AR/VR is more suitable for interactive learning and real-time simulation, immersive and scalable training across institutions.
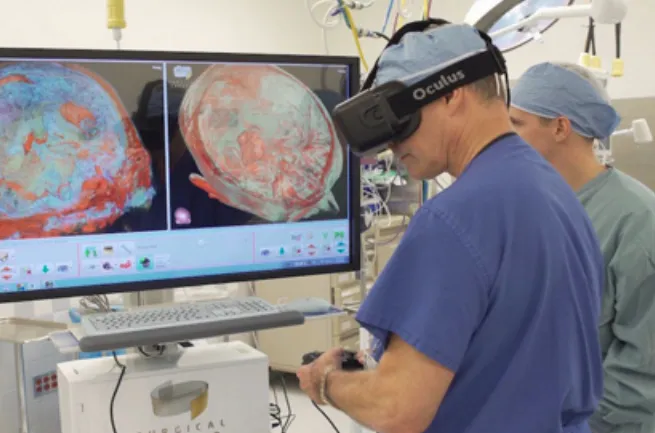
3D Printed anatomy models vs VR
3D Printed Anatomy Models vs. Cadavers
The anatomical accuracy of cadavers can be higher (though with natural variation and possible postmortem changes), but they are much more expensive than 3D printed models. The typical cost of using cadavers (including general surgery instrument tray rental, sterilization, re-packing, and hazardous waste disposal) could be around $8000 for two hours, which is almost four times the cost of a 3D printed model.
3D printed bone with Bonematrix
Step-by-Step Guide to Anatomical 3D Printing
The workflow of developing patient-specific 3D printed anatomical models can be very lengthy, but primarily could be categorized into three steps:
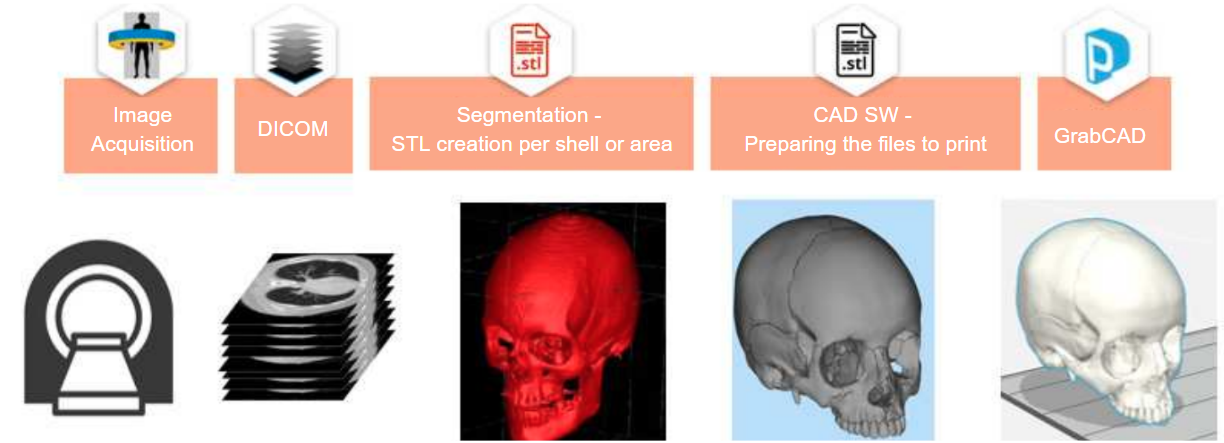
Step 1: 2D Image Acquisition
The most common ways of getting imagery for 3D printing are CT and MRI. Plain X-rays and ultrasounds lack enough contrast resolution to be converted into high-quality 3D models.
CT scans and MRI imaging are exported into DICOM (Digital Imaging and Communications in Medicine – the technical standard for digital storing and transmission of medical images) files that could be considered an array of slices of a 3D object.
Recommendations:
- During the scan process, it’s recommended to have intravenous (IV) contrast (a liquid injected into a vein) to enhance the quality of imaging and visibility of internal structures, particularly with blood vessel, tumor, and solid organs. The contrast will make it much easier to identify and ultimately print the area of interest.
- Additionally, to produce an accurate model for 3D printing, the slice thickness of CT or MRI scans should be less than 1.25 mm. Using thicker slices can reduce the model’s accuracy, while using slices that are too thin may lead to unnecessary, increased workload in subsequent processing steps.
Workflow of Creating 3D Printed Anatomy Models
Step 2: Segmentation + Conversion
Segmentation means to identify and delineate (segment) the anatomical elements of interest.
The DICOM images are transferred into a segmentation software that is made to process the medical data and convert DICOM files into 3D printable STL files.
Currently segmentation is mostly a manual process, with some machine learning technologies automating the process. In a typical manual process, radiologists use the software to identify and separate the regions of interest, and then surgeons will review as the approval of area to be rendered as 3D objects.
There are many segmentation software solutions on the market, from open source to commercial ones: Materialise Mimics, 3D Slicer, Axial3D, Simpleware, Osirix, ITK-SNAP, 4DICOM, Seg3D, InPrint, Synopsys, ScanIP Medical, etc.
Recommendations:
- Being a highly specialized field, the choice of segmentation software directly affects both the fidelity of the 3D models and the range of applications for which those 3D anatomy models can be used.
- It’s also important to make sure that the software complies with relevant regulations in your jurisdiction before making a selection.
Step 3: Print
Depending on use cases, the post segmentation workflow varies:
- For pre-surgical patient-specific models or clinically relevant applications, CAD modification is not permitted – you should send the 3D models straight from segmentation to print preparation.
- For training and education purposes, segmentation outputs may be further modified (e.g. filling holes, smoothing out surfaces, etc.) to better suit your application.
As the print preparation step, operators use CAD software to adjust resolution for detail and file size, choose suitable materials, layer thickness and other features to optimize the printing process.
If you want to learn more about creating 3D printed anatomical models, check out this guide on advanced anatomical medical models. We also have a webinar on digital anatomy printing by 3D printing experts from TriMech and Stratasys.
How to Maximize Effectiveness of Patient-Specific 3D Printed Models
The most effective patient-specific models not only mimic the look of human tissue, but also deliver biomechanical realism during suturing, cutting, or medical device insertion and deployment – all while ensuring efficiency and safety to generate the best clinical outcome.
Safety: Choose a Reliable Segmentation Software
FDA and HIPPA Compliant
To create a patient-specific anatomy 3D model, you must follow both FDA and HIPAA rules:
- FDA: If the model is used for diagnosis, patient management, or treatment planning, it is considered a Class II medical device. The FDA requires that you use FDA-cleared software for creating such models.
- HIPAA: If the process involves patient-identifiable information, you must comply with HIPAA privacy and security rules. This includes safeguarding protected health information (PHI) and, if outsourcing, having a business associate agreement with third parties handling PHI.
Segmentation software needs to go through rigorous compliance process. To speed up your workflow, you need to integrate certified software into the workflow, particularly segmentation software that is FDA-cleared and complies with privacy standards for handling patient data.
Streamlined from DICOM to Print
The segmentation of patient-specific DICOM data is time-consuming and labor-intensive for technicians to manually go through hundreds or thousands of slices to identify and isolate the object to be printed. It also requires high level of technical expertise and expensive software licenses.
There is emerging AI-driven software that can automatically segment CT and MRI scans without significant investments in time, specialized skills and large upfront costs, such as Axial 3D.
Axial3D uploads DICOM image to its cloud-based system which adheres to HIPAA and FDA rules and performs automated segmentation. Once segmentation is complete, the platform generates print-ready 3D files that are compatible with a wide range of 3D printers and materials.

Stratasys Digital Anatomy Printer Axial3D Models
A range of Stratasys printers, including J850 DAP and J5 DAP, and materials have been validated and FDA 510(k) cleared with Axial3D software to produce anatomic models for pre-operative surgical planning and diagnostic use across multiple specialties. The Axial 3D segmentation software pairs smoothly with J5 and J850 digital anatomy printers to create patient models for surgery prep as well as patient-specific prosthetic devices, braces, and educational models.
The J850 DAP is also one of the few ISO-certified printers for medical modelling, which means when segmented using ISO-certified software such as Axial 3D, models produced on the printers accurately represent physical anatomies with enough fidelity to make diagnosis and develop a treatment plan.
Efficiency and Accuracy: Choose a Robust 3D Printing System
A robust 3D printing system is a combination of an advanced printer, smart software, and versatile materials, all while working in a streamlined workflow.
Automatic Material Selection
The ease of the print preparation process largely depends on the type of printer being used:
- Printers using generic materials: Users need to carefully choose materials that either replicate the properties of the target tissue or fit the intended application (for example, opting for a more affordable material for demonstration purposes).
- Printers with medical-specific materials: These printers offer a medically focused interface. When users select an object, they specify the tissue type and relevant health parameters. The software then automatically selects the most appropriate materials for the print.
Created in collaboration with top research institutions, device manufacturers, hospitals, and medical professionals, Stratasys’ Digital Anatomy printers fall into the second category. The series – including J850 DAP and J5 DAP – is pre-programmed with over 100 physician-tested and validated anatomical applications, taking the guesswork out of material selection.
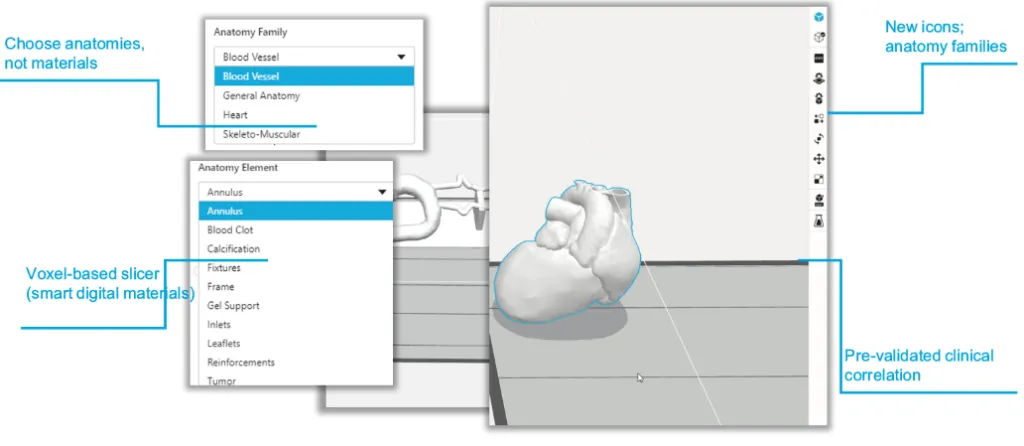
Digital Anatomy Software
Out of the 100+ anatomical applications, some of the preset anatomies and elements include:
- Blood vessels: vessel, frame, calcifications, aneurysm
- Skeleton-muscular: vertebrae, ligament, disc, nerve roots, skull, general bone structures
- General: soft organ tissue, reinforced organ tissue, elastic organ tissue, tumors, fibrotic tissue
- Heart: myocardium, calcifications and leaflets, blood clots, tumors, blood vessels
Each anatomy, preset in the series’ software GrabCAD Print, is configured using unique material combinations that vary in softness, flexibility, and density to mimic native tissue behavior. Operators simply import their segmented anatomy into GrabCAD Print and assign the desired anatomy, and the printer automatically determines the appropriate material composition.
Visually & Functionally Accurate
The DAP system has a unique voxel-based engine that enhances both visual and tactile realism.
The GrabCAD Print, including the optional add-on GrabCAD Voxel Print™ software on the DAP printers, allows for voxel-level control, which gives specific material properties (such as flexible or rigid, opaque or transparent) on the voxel level. A voxel is like a 3D pixel, it’s the smallest area in which a 3D printer can dispense resin. Being able to control the softness and rigidness on such a small level allows the parts to achieve their feel of real anatomy.
By creating voxel structuring using DAP specific materials, the models are not only visually accurate but also functionally and biomechanically precise.
Versatile Materials and Color Options
The ability of printing several materials at the same time could significantly speed up the workflow, without changing materials at any point in the process.
The J850 DAP can print with six materials simultaneously, including transparent, flexible, rigid, and biocompatible options, and supports over 500,000 colors. This versatility allows for highly detailed, multi-textured, and even radiopaque models suitable for imaging studies. The DAP series are also backed by the Pantone Validation, which makes design communication more intuitive.
The materials alongside the J850 are also made for easier fabrication. For example, GelMatrix, the gel-like support material created by Stratasys for the J850 DAP and other PolyJet systems, streamlines the post-processing of blood vessel models. It can be quickly and easily removed from intricate structures, including small blood vessels with internal diameters and wall thicknesses as thin as 1.0 mm, requiring minimal effort.
Other materials unique to the J850 Digital Anatomy Printer include:
- TissueMatrix: the softest material in 3D printing with Shore 000 durometer; best used for hearts, organs, nerves, blood vessels, and bone marrow inside skeletal features
- BoneMatrix: high-toughness material; best used for all bone structures, spinal column, hip, shoulder socket, etc.
- RadioMatrix: used to create models that provide visibility of anatomical structures under X-Ray and CT.

RadioMatrix model in a scan
Conclusion
Creating a patient-specific 3D printed model requires a powerful system that streamlines the entire workflow with advanced printers, smart software, and versatile material options. Stratasys is a leading provider of the 3D printers, materials, and software for these anatomic models that allows you to print accurate, lifelike models in a few clicks.
Reach out to our experts if you want to create models that not only look the part but also respond like the real thing.

Written by Sophie Jin
Sophie (Huiyu) Jin is an SEO/PPC Specialist at TriMech, where she focuses on digital marketing strategies for their additive manufacturing and CAD business units.
Prior to joining TriMech, Sophie worked as a business journalist both in Canada and China, covering various industries, particularly tech companies.
Related TriMech Solution
Learn more about the solutions featured in this Article:
Need a Quote for Advanced Manufacturing?
Contact a TriMech manufacturing expert today and get answers to your questions
Related Content
More advanced manufacturing content from the TriMech team