


4-Step 3D Photogrammetry Experience with Artec Studio 19
By Michael Krisfalusi, last updated May 27, 2025
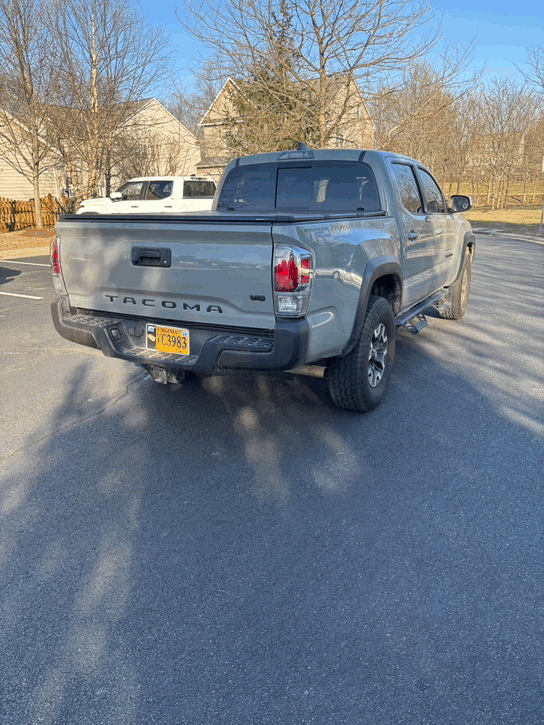
As a first-time user of 3D photogrammetry software, I tried the AI Photogrammetry tool in the latest Artec Studio 19 software, starting with a few small and mid-size objects and then moved on to scanning a Toyota Tacoma truck.
For those without access to a 3D scanner, this post explores AI photogrammetry features in Artec Studio 19 and walks through the entire process from importing photos to applying textures. You’ll also find expert recommendations throughout the steps.
What is Photogrammetry?
Photogrammetry is a technique used to create 3D models from 2D photos or videos. It works by analyzing multiple overlapping photos of the same object or scene, taken from different angles, to extract depth and spatial information.
What is Artec Studio?
Artec Studio is an all-in-one 3D scanning software for 3D modeling, reverse engineering, and inspection developed by Artec, a global leader of 3D scanners based in Luxembourg.
With the 3D photogrammetry tool, the latest Artec Studio 19 software can create 3D models with photos from a camera or even just a smartphone. This AI-driven photogrammetry uses the power of artificial intelligence to combine meshes at a higher level, accelerating the processing of 3D data, creating polygon meshes and textures more efficiently.
4-Step 3D Photogrammetry
Step 1: Capture Photos or Videos
Start by capturing photos of your subject. Depending on its size and shape, take pictures from a multitude of angles to ensure that every possible detail, including small gaps, translucent and transparent surfaces are captured.
4 Recommendations for Capturing Images
- Use consistent lighting. It’s important to find a place where the lighting is not too bright or too dark, and avoid a reflective glare (especially for cars, through the cars paint and windows.)
- Keep the orientation the same (landscape or portrait) throughout the entire photo set to ensure consistency.
- Use a 3D scanning turntable for smaller size objects, as the table rotates making it easy to get photos of every angle. If the object is two sided, make sure to capture two separate photo sets.
- Try to take:
- A full loop around the subject
- A second loop from a higher angle
- A third loop from a lower angle
Step 2: Import Photos or Videos into Artec Studio Software
Once you’ve captured your images or videos, like we did with the circumference of the car, import them into Artec Studio 19.
Importing into Artec Studio 19 is fast and easy, as it can handle a multitude of file formats. Once all files are imported, they will be organized as a “Photo Set”.
Videos are also able to be imported. There is full customization to select how many frames per second you want to be import into a “Photo set”.
File Formats supported by Artec Studio 19’s Photogrammetry tool:
- Photos: .bmp, .jpeg, .tif, .png
- Videos: .mov, .mp4, .avi, .m4a, .m4vm, .3g2, .3gp, .3gp2, .3gpp
When importing all the photos and videos, you are able to check each frame and pick the photos you want to be involved in the next step.
Step 3: Sparse Reconstruction
With the photo set fully imported, you are able to begin Sparse Reconstruction.
Sparse Reconstruction is the automatic alignment of images that allows you to identify fine features with unique algorithms. To put it simply, as the name suggests, this step creates a very basic “skeleton” version of the 3D model by using some key points. This is the step of watching the model take shape!

The shape and position of the object is more refined using Artec Studio 19, because you’re able to process by scene type, orientation, optimization quality, and position for changes between photo sets.
You can also optimize for speed or quality – which should consider the processing power of your computer, and how long you want to wait for the reconstruction to be complete.
Once the Sparse Reconstruction process is complete, you’re able to view the new photo set in different categories (Photos, Masks, and Masked Photos), as well as error rating for each photo – depending on how high of an error rating (with a yellow or red circle), you can choose to further exclude that file. You can see which frames had been registered and which had a high error rating that should be excluded. Once the photo set is organized, you can use the cropping box to get the height, width, and length of the scan to ensure the entirety of the scan. You can see from the picture above that we go the full dimensions of the car!
Step 4: Dense Reconstruction
Dense Reconstruction is the combination and generation of a mesh from a scan. To put it simply, unlike the earlier step of sparse reconstruction which just look at a few key points, this step looks at every pixel and examines every part of the overlapping photos to find matches in different images.
3 Recommendations for Dense Reconstruction
- Depending on your computer, you can pick whether you want the detail to be normal or high.
- Depending on the object, sometimes you’ll need to do some additional editing to ensure that your model comes out completely accurate – does the scan have unneeded polygons, uneven edges, or a rough texture? The Mesh Optimization tool will help refine your mesh and help improve the accuracy and results of the scan.
- Under the texture section, you can select Sparse Reconstruction as your texture source after applying it. You can customize the Brightness, Saturation, Contrast, and Gamma Correction to your liking. And just like that, your scan is complete!

After running the Dense Reconstruction, we were really surprised with how detailed the Tacoma came out! It ran into some polygons that were not related to the scan, but mesh optimization did an amazing job of removing those unneeded polygons.
And now you can see the final model! We have officially contracted a feature rich model that is ready for direct application.

Overall, from photo to model, we were genuinely surprised with how well this model came out! It is smooth, the paint on the car is exactly what it looks like in person, and it was able to pick up the most minuscule of details: dirt, rock rails, and headlights.
Try Artec Studio 19 for free
Artec 3D offers Artec Studio 19 Professional and a trial version that is free to use.
With this version you are able to try out all of Artec Studio 19’s new features and the 3D photogrammetry tool for yourself and see if its good fit for your workflow. The free version does restrict file saving and exports but will give you the option to test it out for your application.
Visit the Artec Studio 19 homepage or create an account on my.artec3d.com and try their all-new photogrammetry software. All you need to do is create an account, download the Artec Installation Center, then download the latest Artec Studio 19 trial.
Simple Enough for Beginners, Powerful Enough for Experts
Even if you’ve never scanned before, you can get great results with just a smartphone and this software. Though the journey of scanning this truck, we quickly made consistent and colorful lifelike 3D models from the photos and videos taken with just a smartphone. 3D photogrammetry does a great job of bringing 3D models to life!
Whether you’re new to CAD and scanning or a seasoned pro, Artec Studio 19’s photogrammetry tool helps you create high-detail, realistic models of shiny exteriors, complex geometries, and more—without requiring expensive equipment.
Depending on your main goal for 3D Scanning, our engineers can advise you with the right tool for your project. Just reach out to talk with our experts. We also have this 3D Scanner Price & Buyers Guide to help you find a model that best fits your needs.
Related TriMech Solution
Learn more about the solutions featured in this Article:
Need a Quote for Advanced Manufacturing?
Contact a TriMech manufacturing expert today and get answers to your questions
Related Content
More advanced manufacturing content from the TriMech team